Last updated November 18, 2026
Free written scope consultation - allowances, timeline, and change-order rules on paper before a single trade is scheduled
DIY vs Professional Windows & Doors: What’s Safe to Do Yourself
Here’s a number that surprises most homeowners: a Palmdale homeowner who installs a replacement window perfectly, saving $200 – $400 in labor, can still owe $150 – $300 for a HERS rater field verification before the permit will close. The installation was free. The paperwork wasn’t. That gap between “can I physically do this” and “can I legally close this out” is where most DIY window and door projects get stuck, and it’s what this guide unpacks. You’ll learn which swaps are permit-exempt, which trigger Title 24 energy compliance, where moisture failures actually happen, and how to run the real math before you pick up a pry bar.
Quick Answer
In Palmdale, replacing a window or door like-for-like (same size, same glazing U-factor, same operation type) is often permit-exempt, but changing the size, glazing performance, or opening type triggers a building permit and, in most cases, Title 24 energy compliance documentation that must be filed by a licensed contractor or certified HERS rater. Physically, a skilled DIYer can swap a single double-hung unit in 2 – 4 hours; the hard part isn’t the carpentry, it’s the flashing detail and the compliance paperwork. Flashing errors cause the moisture damage we see most often, and the compliance sign-off is the cost most DIYers don’t budget for.
Styles & brands we work with
- Kitchen remodeling
- Bathroom remodeling
- Home additions & ADU
- Roofing
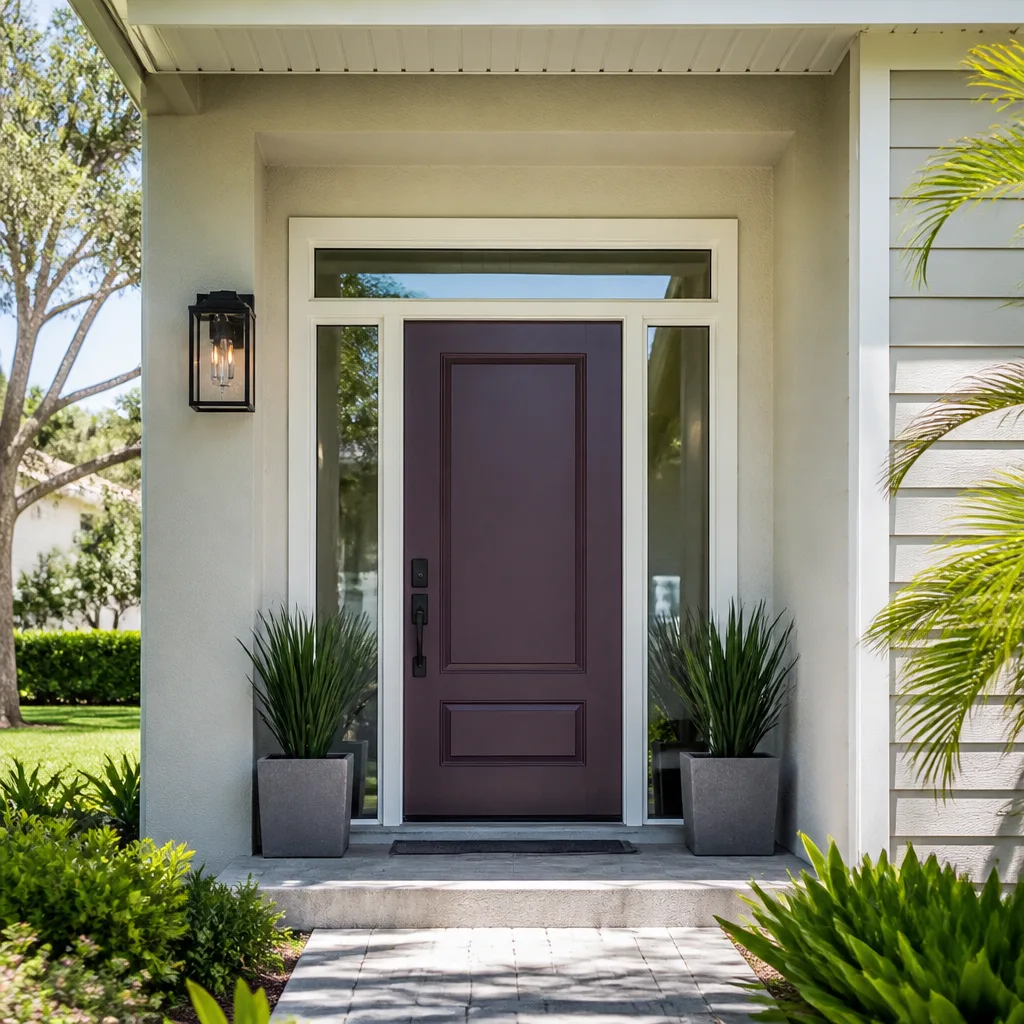
- Windows & doors
- Driveway & pavers
- Fence
Table of Contents
- The California Permit Line: Like-for-Like vs. Alteration
- What Title 24 Actually Requires in Palmdale
- Rough Opening Prep: What Actually Happens in the Wall
- Flashing Sequence: The Step Videos Skip
- The Real DIY Savings Calculation
- Warranty Implications for Self-Installation
- Doors Are a Different Animal
- Palmdale Climate and Why Doors and Windows Age Fast Here
The California Permit Line: Like-for-Like vs. Alteration
The single most useful distinction in this entire guide: does your project count as a like-for-like replacement or an alteration? California’s building code treats those two very differently, and the answer decides whether you’re looking at a weekend project or a documented one.
A like-for-like replacement means the new unit matches the old one in size, location, operation type, and glazing performance. You are pulling a 36-by-60-inch double-hung and putting a 36-by-60-inch double-hung back in the same opening. Same rough opening dimensions. Same or better U-factor and SHGC (solar heat gain coefficient, the number that measures how much solar heat the glass lets through). Under Palmdale’s local permitting practice, that kind of swap is typically issued as an over-the-counter or online permit and usually does not require a HERS field verification because there is no change to the energy compliance assumptions on the original home.
An alteration is anything past that line:
- Enlarging or shrinking the rough opening, even by two inches
- Changing operation type (slider to casement, fixed to operable)
- Switching from single-pane to dual-pane where the home’s Title 24 compliance was calculated on a different assembly
- Adding a new opening in a wall that didn’t have one
- Replacing more than a threshold percentage of glazing area in a single project
The moment any of those apply, you’re in alteration territory. That means a permit, a plans check, and usually Title 24 documentation showing the new assembly meets or beats the prescriptive energy target for Palmdale’s climate zone. We’ve seen homeowners call a permit office expecting a two-week turnaround and discover the alteration path is closer to six weeks with inspections. That’s not a reason to avoid the work; it’s a reason to know which lane you’re in before you order the unit.
One practical move: pull the original permit record or have it pulled for you. The original glazing specs on your home’s Title 24 compliance documentation are the baseline your replacement gets measured against. If you can’t find it, a licensed contractor or HERS rater can reconstruct it from the county record. The Palmdale building department can also tell you which permit type applies to your specific address before you buy anything – a phone call that takes ten minutes and saves weeks.
What Title 24 Actually Requires in Palmdale
Title 24 is California’s energy code. For windows and doors, it sets minimum performance for U-factor (how fast heat moves through the assembly) and SHGC. Palmdale sits in a climate zone that runs hot in summer and cold in winter, which means the prescriptive targets here are stricter than coastal zones. A dual-pane window that’s fine in a Santa Monica bungalow may not clear the Palmdale compliance bar on an alteration project.
Here’s the part that trips DIYers: the code doesn’t care who holds the pry bar. It cares who signs the compliance documentation. On an alteration path, the Certificate of Compliance (the CF1R form) is typically prepared by a licensed contractor or a certified energy consultant, and the installation gets verified by a HERS rater who visually confirms the unit matches the declared specs and performs field testing on a sampling basis. That rater field verification is the $150 – $300 line item we opened with. It doesn’t disappear because you installed the window yourself.
What a rater checks on site:
- The installed unit’s NFRC label matches the specs on the compliance form (U-factor and SHGC must match or beat the declared values)
- Rough opening dimensions and location on the wall
- Air sealing around the frame perimeter
- Flashing integration at the sill, jamb, and head
If the label is gone (it usually gets pulled off during install), you’ll need the manufacturer’s spec sheet for that model, and you’ll need to prove the unit you installed is the one on the paperwork. This is why ordering the unit after the compliance form exists matters. Order first, install first, and you may discover the unit you bought doesn’t clear the energy target for the project type. We’ve seen that mistake force a full replacement of an already-installed window.
Like-for-like swaps, when they qualify, sidestep this entire chain. That’s the leverage. Know the criteria, keep the spec identical, and the paperwork shrinks to almost nothing.
Rough Opening Prep: What Actually Happens in the Wall
Watch any installation video and the rough opening looks like an afterthought: pull the old unit, slide the new one in, done. In practice, that opening is where the durability of the whole installation lives. Four things happen in a proper prep:
- Demolition and inspection of the substrate: pulling the old unit exposes rot, insect damage, or sheathing delamination. In Palmdale’s older housing stock (a lot of it built between 1955 and 1985, before modern weather barriers were standard), we regularly find the sill plate soft from years of slow leaks the homeowner never saw.
- Squaring the opening: the rough opening is checked for plumb, level, and square. A racked opening forces the new unit out of square, which binds the sash and lets daylight through corners.
- Shimming: tapered shims are inserted at specific load points (under the sill corners and at the jamb midpoints) to transfer the window’s weight into the framing, never into the flashing. Shims are cut flush and screwed in place. Over-shimming lifts the frame and breaks the seal at the head; under-shimming lets the unit sag.
- Pan flashing installation: a sill pan (a sloped flashing tray) goes in before the window does, set on a continuous bead of sealant and sloped so any water that gets behind the frame drains out and down, not into the wall cavity. This is the step that separates a twenty-year window from a five-year one.
That first item is why we advise opening the wall before ordering anything. If the substrate is compromised, the project scope changes and the flat-window-swap math you ran doesn’t apply anymore. This same substrate inspection logic runs through every opening trade, from windows to the driveway and paver work we do in Palmdale, where a failing base is always the first thing examined before any surface goes down.
Flashing Sequence: The Step Videos Skip
Flashing errors are the single most common moisture failure we see. Water doesn’t care how well the window fits. It cares whether the layers around the window overlap in the right order so gravity carries it out instead of in. The correct sequence is always top-down layers, each shedding water over the one below, and it works from the inside out:
- Sill pan flashing first. The pan goes into the rough opening before the window, sloped to the exterior, and it laps over the weather-resistive barrier (WRB, the housewrap or building paper behind the stucco) at the outside edge.
- Window set into the pan. The frame sits on the pan, shimmed, plumbed, squared.
- Jamb flashing next. Left and right jambs get flashing tape applied from the bottom up, overlapping the sill pan at the bottom corners.
- Head flashing last, on top of everything. The head flashing goes over the window’s top flange and, critically, under the WRB that laps down from above. The WRB over the head flashing, then head flashing over the window flange. That ordering lets water run down the wall, over the WRB, over the flashing, over the window, and out. Get it backwards (flashing over the WRB) and water gets funneled directly into the wall cavity.
In Palmdale, this is a stucco situation. Most homes here are three-coat stucco over building paper, and the paper is the WRB. Any window replacement breaks the stucco at the rough opening, and reassembling that assembly correctly requires cutting back the stucco, integrating the flashing with the paper, then patching stucco, adding weep screed and a control joint, and matching texture. This is where DIY window installation gets genuinely hard. Flashing tape is cheap; stucco repair after a failed flashing integration runs $800 – $2,500 and usually takes a second contractor to fix.
The failure photographs we see are depressingly consistent: a ring of dark staining on the drywall under the sill, six months to two years after the install. Pop the trim and the paper behind it is black. That’s not a window defect; that’s a flashing detail that ran in the wrong order or was skipped entirely. The proper sequence matters more than the window brand.
If the project expands beyond a window into the wall or structure itself, that’s a different conversation – our guide to home additions and ADUs in Palmdale covers what triggers engineered plans and full inspections.
The Real DIY Savings Calculation
Here’s the math, done honestly. Professional installation labor on a standard replacement window runs about $85 – $120 per unit, depending on size, floor height, and whether it’s a first-floor replacement or needs ladder work. A skilled DIYer with the right tools can install a single double-hung replacement in 2 – 4 hours. At an effective rate of roughly $40 an hour for the DIYer’s own time, that’s $80 – $160 of labor value against the $85 – $120 a pro charges – before tools and materials.
The savings table:
- One window, DIY: $85 – $120 saved in labor, minus $40 – $80 in materials (flashing tape, shims, sealant, stucco patch), minus 2 – 4 hours of your time. Net savings: $5 – $80.
- Five windows, DIY: $425 – $600 in labor saved, minus $150 – $350 in materials, minus 10 – 20 hours. Net savings: $75 – $450.
- One window on the alteration path: the $150 – $300 HERS verification and permit fees consume the entire labor savings on a single-window job. The project nets a loss on cash even if the installation was flawless.
The honest read: DIY savings on windows are real at quantity (5+) and vanish at quantity of one. The savings also assume no rework. One failed flashing detail costs more than the labor saved on a four-window job. Where DIY genuinely pays off is when the project is a true like-for-like swap, the rough opening is sound, the opening is a standard double-hung or casement with a clean exterior trim detail (no stucco cutting), and you buy the units after confirming the spec with the building department. Remove any of those variables and the math flips.
Get the free second opinion first. If you have a written estimate from another contractor, Rowan Construction Group will review it line by line at no charge – useful when you’re trying to figure out whether a labor number is honest or padded.
Warranty Implications for Self-Installation
The good news: most residential window manufacturer warranties are written to survive homeowner installation, provided the unit is installed to the manufacturer’s published installation instructions. That means following the sequence in the printed instructions to the letter – the shim points, the fastening schedule (screw spacing at the jambs and sill), the flashing integration detail. Install it per the spec and the material warranty on glass and sash stays intact.
The nuance that matters: some product lines within the same manufacturer offer a longer “full warranty period” (commonly 10 to 20 years on glass, sometimes longer on the sealed unit) only when installation is performed by a factory-certified or licensed professional installer. The unit itself is warranted either way; the extended labor-and-service coverage may not be. When you buy, ask the dealer for the specific product line’s warranty document and read the installation clause. It’s usually one or two paragraphs, and it’s the only honest source of truth. Brand matters here: Milgard and Andersen both publish these terms clearly, and getting them in writing before purchase means no argument later.
The installation itself generates a separate warranty – the labor warranty – which you don’t get when you do the work yourself. If the seal fails at month 14 and water gets behind the frame, the materials warrantor points at the installation and the installer (you) is the only one left holding it. That’s the practical value of a written labor warranty, and it’s what our Rowan Construction Group Palmdale home page describes as the 365-Day Done Right Promise: if it isn’t done right, we make it right. A manufacturer warranty and a labor warranty are two different things, and only one of them comes with DIY.
Doors Are a Different Animal
Interior doors are the easiest entry point in this category. A pre-hung interior slab hung on a plumb frame, trim and all, is a two-to-three hour job with a level, a shim kit, and a nail set. No permit, no energy documentation, no flashing. If you’re a homeowner who wants to test whether you enjoy this work, start there.
Exterior doors are the opposite end of the spectrum. An exterior door is a weather assembly with the same flashing requirements as a window plus load-bearing considerations (the header above the door), threshold integration with the exterior grade, and, in Palmdale, direct sun exposure that cooks finishes. A south-facing entry door sees sustained afternoon sun; the finish fails faster here than in coastal neighborhoods, and any gap in the threshold seal lets wind-driven dust in during spring wind events. That’s before the Title 24 question – exterior doors carry energy compliance requirements like windows do on the alteration path (U-factor minimums), and glazed doors especially get scrutinized.
Sliding glass doors are the hardest DIY exterior door. They’re heavy, the tracks depend on a level and square opening down to a sixteenth of an inch, and the threshold flashing has to integrate with both the interior floor and the exterior drainage in a way that most installation videos gloss over. The failure we see most: a threshold that sits too high, leaving a gap that lets water puddle against the frame during the rare but real Palmdale rain events. If your exterior door is on an alteration path or sits in a wall with stucco, this is the one we’d push toward professional.
Palmdale Climate and Why Doors and Windows Age Fast Here
Palmdale’s climate is a dual assault on window and door assemblies. Summer afternoons routinely hit triple digits, and the sun angles low enough in the afternoon that west-facing glass absorbs hours of sustained heat. That heat cycling – hot afternoon, cool desert night, repeated for thousands of cycles over twenty years – works seals, paint, and caulk lines harder than the same window faces in a coastal climate. UV degradation at that intensity cracks glazing beads and dries out weatherstripping in roughly half the time it takes elsewhere.
Then there’s the wind. Spring and fall wind events in the Antelope Valley drive fine desert dust against every exterior seam. A window or door with even a small perimeter gap lets that dust in, and the dust acts as an abrasive on the weatherstripping and the sash seals. This is why we tell homeowners: the perimeter air seal matters more in Palmdale than almost anywhere. Caulk and weatherstripping are wear items here, not lifetime parts. Budget for re-caulking the exterior perimeter every 3 – 5 years and check the weatherstripping annually.
What this means for construction material choices: fiber cement trim (James Hardie’s line is the standard reference) holds up better against our sun and dry heat than wood trim, which checks and splits. Our fence installation work in Palmdale sees the same wear pattern on exterior wood in the elements, and the lessons transfer: any exterior surface on the wind and sun side needs a product designed for the desert, installed with attention to movement, not just painted over and forgotten.
Common Mistakes to Avoid
- Ordering the unit before confirming the permit path. In Palmdale, an alteration-path window needs to clear the Title 24 target for the project type. Buying first and confirming later means a unit that clears for the wrong project, and a return or a replacement at your cost.
- Skipping the sill pan to save an hour. The sill pan is the cheapest insurance in the project, and its absence is the single most common cause of the rotted drywall ring we described above, often $800 – $2,500 to repair.
- Running the flashing over the WRB instead of under it. The exterior weather barrier must lap over the head flashing, not the other way around. Every retrofit stucco failure we’ve seen traced back to this one detail.
- Not accounting for the HERS verification on the alteration path. A $150 – $300 rater fee doesn’t disappear because you installed the unit yourself. Fold it into the math before you compare DIY against a professional quote.
- Assuming all exterior doors are interchangeable with windows. Sliding glass doors, especially, need a level and square opening and integrated threshold flashing that most DIY installation attempts underbuild.
- Throwing away the NFRC label before the inspection. The rater needs to confirm the installed unit matches the compliance form. If the label’s gone, you’re proving the unit’s identity some other way, and it’s a hassle.
- Never re-caulking the perimeter after the first Palmdale summer. The sun and dust eat exterior seals here at twice the rate many homeowners expect. Annual perimeter checks and 3 – 5 year re-caulks are the maintenance schedule this climate requires.
See the difference
 Before
 After
 Before
 After
 Before
 After
When to Call a Professional
Call a professional when your project hits any of these: the swap is an alteration (size change, glazing spec change, or new opening), the opening sits in stucco, the substrate is suspect, the unit is a sliding glass door or an exterior door in an exposed wall, or the building department tells you a HERS verification is required. Any one of those makes the DIY math fail. Windows and doors installed correctly are a twenty-year assembly; installed wrong, they’re a water problem behind a wall you can’t see.
Rowan Construction Group Palmdale offers free estimates in Palmdale – call (844) 320-8244. Our technicians have up to 19 years of experience, bring a background-checked crew in clean uniform, and every visit includes a documented photo record as a standard deliverable. You get a written flat price and written scope before any work starts, and no change proceeds without a signed change order. If it isn’t done right within the first year, the 365-Day Done Right Promise puts it right.
Frequently Asked Questions
Often yes for a true like-for-like replacement – same size, location, operation type, and glazing performance – which is typically permit-exempt under Palmdale practice. Changing the size, glazing U-factor or SHGC, or operation type pushes it onto the alteration path, which requires a permit and usually Title 24 energy documentation signed off by a licensed contractor or certified HERS rater.
Field verification for a residential window replacement project typically runs $150 – $300, plus permit fees, on the alteration path. Call (844) 320-8244 for a written estimate that breaks out the permit, compliance, and installation line items – estimates are free.
Professional installation labor runs about $85 – $120 per window depending on size and access. A skilled DIYer can install one double-hung in 2 – 4 hours, so a single-window DIY job nets $5 – $80 after materials – barely worth the risk. At five or more windows the savings become real, provided the flashing and stucco detail are done correctly. Call (844) 320-8244 to get a written number to compare against.
Usually not, provided the unit is installed to the manufacturer’s published instructions – but some product lines only honor the extended warranty period when a licensed professional installs the unit. Read the specific product’s warranty document before purchase. The installation labor warranty, though, is separate, and you don’t get one if you do the work yourself.
Yes, generally. Exterior doors carry the same flashing requirements plus header load considerations, threshold integration with the exterior grade, and Title 24 compliance on the alteration path. Sliding glass doors are the hardest – they need a level, square opening and integrated threshold flashing, and our climate’s wind-driven dust punishes any gap. Call (844) 320-8244 for a free estimate on exterior door replacement.
No. Interior door replacement – a pre-hung slab swapped like-for-like into an existing frame – doesn’t require a permit, and it’s the most DIY-friendly project in this category. Two to three hours with a level, shims, and a nail set. If you enjoy it, that’s a signal you may enjoy the framing side of a window swap; if the interior door fights you at every step, that’s a signal to hire out.
The Bottom Line
The clean line for Palmdale homeowners: true like-for-like glass swaps are often permit-exempt and genuinely DIY-ready, and pushing past that line triggers both the energy compliance paperwork and the moisture details that fail. Flashing sequence and rough opening prep are skills worth paying for; a single interior slab door is not. Run the savings math honestly – the $85 – $120 per window labor savings evaporates on a single unit and holds up only at quantity with a clean stucco detail. When you want the number in writing before anyone picks up a tool, Rowan Construction Group Palmdale delivers a flat written price and written scope, a background-checked crew, a documented photo record on every visit, and the 365-Day Done Right Promise behind it.
Call (844) 320-8244 for a free estimate, and if you have a written quote from another contractor, bring it – our line-by-line second opinion is free.
Written by the team at Rowan Construction Group Palmdale.