Last updated November 18, 2026








Free written scope consultation - allowances, timeline, and change-order rules on paper before a single trade is scheduled
Bathroom Remodeling Maintenance Schedule: What to Do and When
Grout sealer applied at the wrong humidity level fails within 18 months instead of the 10 years on the label, and nothing about it looks wrong from the tile face. Palmdale’s desert air pulls moisture out of curing sealant faster than the manufacturer’s test conditions assume, so a sealer that would hold for a decade in a humid climate can turn chalky and porous before the second winter. The manufacturer’s coverage doesn’t announce itself as void. It just quietly stops applying. What follows is the maintenance calendar we hand to homeowners after a bathroom remodel in Palmdale: what to do at 30 days, 6 months, 1 year, and 5 years, which products each task applies to, and how to tell the difference between a homeowner task and a warranty claim.
Quick Answer
A bathroom remodel needs four scheduled maintenance windows: a 30-day check of caulk lines and grout after settling, a 6-month deep clean of the exhaust fan and re-seal of wet-area grout, a 1-year inspection of the waterproofing and fixture connections, and a 5-year refresh of silicone, sanded caulk, and fan components. In Palmdale, the dry climate and hard MWD water compress some of these intervals – grout sealing every 12 to 18 months rather than every 2 years, and exhaust fan cleaning every 6 months rather than annually.
Styles & brands we work with
- Kitchen remodeling
- Bathroom remodeling
- Home additions & ADU
- Roofing
- Windows & doors
- Driveway & pavers
- Fence
Table of Contents
- Why Palmdale’s Climate Changes the Standard Schedule
- The 30-Day Check: What Settles and What Doesn’t
- The 6-Month Tasks: Fans, Grout, and Hard Water
- The 1-Year Inspection: Waterproofing and Fixtures
- The 5-Year Refresh: What Wears Out First
- Reading Your Punch List and Warranty Documents
- What a Failed Waterproof Membrane Looks Like
- The Full Schedule at a Glance
Why Palmdale’s Climate Changes the Standard Schedule
Palmdale sits at roughly 2,600 feet in the Antelope Valley, where relative humidity routinely drops below 20% and summer highs push past 105°F. That combination does two things to a bathroom that general maintenance guides don’t account for. First, it cures sealants and caulks faster than the label expects, which means they skin over before they’ve bonded fully to the substrate. Second, it accelerates the evaporation that makes grout and thinset appear dry when they haven’t reached full strength.
Then there’s the water. Much of Palmdale’s supply comes from Metropolitan Water District sources, and the local blend runs hard – calcium and magnesium in the 12 to 18 grains-per-gallon range depending on the season and the imported-versus-groundwater mix. Hard water leaves mineral film on glass, etches polished stone, and clogs the aerators and showerhead screens that feed your fixtures.
What that means in practice:
- Grout sealing moves from every 2 years to every 12-18 months in Palmdale, especially on shower floors and the lower 12 inches of walls where splash hits hardest.
- Silicone caulk at the tub-to-tile and shower-to-floor joints needs inspection every 6 months, not annually, because the thermal swing between a 45°F winter morning in the Antelope Valley and a 105°F July afternoon works that joint constantly.
- Exhaust fans pull desert dust year-round, not just pollen season, so filter screens load faster than coastal-climate schedules assume.
- Glass shower doors need squeegee-and-treat habits daily in hard water, not weekly, or the mineral film bonds and requires a razor blade to remove.
If you’ve recently finished a bathroom remodel and want the maintenance plan documented in writing from day one, the crew behind our Rowan Construction Group Palmdale home page builds that schedule into the handoff packet at project close. No guessing six months later about what product went where.
The 30-Day Check: What Settles and What Doesn’t
New construction moves. A bathroom that’s been tiled, grouted, caulked, and put into daily use for 30 days has gone through its first cycle of expansion and contraction, and the joints that will fail first are already telling you where they are. The 30-day check isn’t cosmetic; it’s diagnostic.
- Walk every caulk line with a flashlight held at a low angle. Look for hairline separation at the tub-to-tile joint, the shower-to-floor joint, and the vanity backsplash. A joint that has separated in 30 days is telling you the substrate moved or the caulk was applied to a damp surface.
- Press on the base of the shower pan and the floor tile near the drain. Any flex or hollow sound means the thinset didn’t fully bond, and that’s a warranty item, not a maintenance item.
- Run the exhaust fan for 15 minutes and hold a piece of toilet paper against the grille. If it doesn’t hold, the fan is either undersized, ducted wrong, or blocked. Note the model number for your records.
- Check the toilet base for rocking and any water at the flange. A toilet that rocks after 30 days needs the flange inspected before the wax ring fails.
- Test the shower pan drain for slow draining. A 30-day clog means construction debris reached the trap.
- Photograph every finding with your phone. Date-stamp the photos. This is the baseline that makes any 1-year warranty claim provable.
In our experience across Palmdale remodels, the single most common 30-day issue is a silicone joint at the shower floor that was applied during a dry afternoon but on a slightly damp substrate. It looks perfect for three weeks and then starts a hairline pull. If you catch it at 30 days, it’s a maintenance call. If you catch it at 18 months, it’s a membrane inspection.
The 6-Month Tasks: Fans, Grout, and Hard Water
Six months is when the fan has loaded with dust and the grout has started to absorb whatever your water is carrying. Exhaust fans are the single most neglected component in any bathroom, and the numbers on fan degradation are the reason.
A residential bath fan that starts at 110 CFM typically drops to about 88-94 CFM after a year of uncleaned use, and continues to degrade roughly 15-20% per year after that. That matters because ASHRAE 62.2 ventilation standards and California’s building code both assume a functioning fan. Once a fan drops below about 60% of its rated CFM, it can no longer clear the humidity a hot shower puts into the room within the 20-30 minutes it’s designed to. Below that threshold, moisture starts migrating into the wall cavity and behind the tile.
The 6-month checklist:
- Exhaust fan: Unplug at the breaker, remove the grille, and vacuum the blades and housing with a soft brush attachment. Most builder-grade fans also have a small motor housing you can wipe down. Don’t spray cleaner into the motor.
- Grout: Deep clean with a pH-neutral tile cleaner and a soft-bristle brush. Skip the vinegar-and-baking-soda routine on cementitious grout – the acid etches the grout surface and accelerates the exact wear you’re trying to prevent.
- Grout sealer touch-up: Reapply penetrating sealer to shower floors and the lower 12 inches of the walls. In Palmdale’s humidity, 6 months between touch-ups is not overkill – it’s the interval that keeps a 10-year sealer performing like one.
- Glass shower doors and enclosures: Treat with a hard-water remover specific to glass (not tile cleaner), then apply a glass sealant quarterly. Filtered water or a squeegee after every shower is what keeps mineral film from bonding.
- Silicone caulk inspection: Re-check every wet joint. Any curling, discoloration, or separation is a replacement, not a caulk-over.
If your shower has a rain head, glass tile accent wall, or luxury-brand fixtures from Kohler or Toto, these manufacturer maintenance recommendations generally track with the above, but their factory-applied finishes often reject harsh cleaners. Read the fixture care sheet that ships in the box and stick to it.
The 1-Year Inspection: Waterproofing and Fixtures
Year one is the window where the 365-Day Done Right Promise earns its keep – and where the boundary between homeowner maintenance and warranty work gets tested. This is the moment to walk the bathroom with a contractor’s eye, even if you’re the one doing the walking.
- Pull the shower head, tub spout, and valve trim. Look at the wall behind the trim for any darkening or soft spots. The wall around the valve handles sees the most water intrusion of any spot in the bathroom because that’s where the pressure balance cartridge penetrates the waterproofing layer.
- Look at the bottom row of tile in the shower. Press firmly on each tile. Any movement means the thinset under that tile has failed and the waterproofing is now the only barrier between the shower and the studs.
- Inspect the caulk line where the shower threshold meets the floor. A threshold joint that stays wet after a day of sitting is telling you there’s a gap somewhere behind it.
- Check the exhaust fan again against its CFM rating. If it was 110 CFM at install and now measures under 70 CFM on a handheld anemometer, the fan has degraded below threshold and needs replacement.
- Look at the grout color across the shower floor. Uneven darkening – especially a patch that stays dark for hours after use – signals sealer failure at that spot, and possibly water trapped below.
- Document everything with dated photos. If the year-one inspection turns up a membrane issue, this record is what turns a homeowner complaint into a warrantable claim.
Palmdale homes built in the 1980s and 1990s neighborhoods like Rancho Vista and Desert View often have original tile-on-mortar-bed showers where the membrane is a hot-mop pan behind the bed. Those are robust when intact but fail invisibly. If you’re doing a year-one inspection on a recent remodel, you should have received the written warranty and the photo record of the membrane installation at project close – without those two documents, you don’t actually know what you’re maintaining.
The 5-Year Refresh: What Wears Out First
Five years in, the original sealant system is at the end of its useful life regardless of how well you’ve maintained it, and the wear pattern is predictable. The list, in order of what fails first:
- Silicone caulk at the shower floor (2-4 year life in hard water, thermal-swing climates)
- Grout sealer on shower floors (2-3 year practical life despite 10-year labels, in Palmdale air)
- Tub spout diverter and valve cartridge O-rings (3-5 years)
- Shower door sweeps and magnets (3-5 years, and a worn sweep is a water-migration issue not a cosmetic one)
- Exhaust fan motor bearings (5-7 years on builder-grade fans; longer on premium units)
- Toilet fill valve and flapper (5-7 years; hard water accelerates both)
The 5-year work is a coordinated refresh: cut out and replace every silicone joint in the wet zone with 100% silicone (not siliconized acrylic, which is the most common misapplication we see), re-seal grout with two coats of penetrating sealer 24 hours apart, replace the fan if it’s below 70 CFM on test, and replace the toilet fill valve and flapper preemptively. The cost of the 5-year refresh is typically in the range of a few hundred dollars done as maintenance versus the four-figure territory of a membrane repair triggered by neglect.
If the 5-year point on your calendar coincides with a broader wish to change the bathroom’s footprint or layout, that’s a different conversation – the same team that maintains is not always the team that rebuilds. When Palmdale homeowners do remodel to add square footage or a second bathroom, the project often falls under our Home Additions & ADU in Palmdale work rather than pure bathroom scope. The maintenance principles are identical; the punch list is bigger.
Reading Your Punch List and Warranty Documents
The single most common maintenance mistake homeowners make after a remodel isn’t skipping a task – it’s doing work themselves that would have been covered under warranty, and thereby voiding it. The documents you need to read carefully are the punch list, the written warranty, and the change order record.
The punch list you should have received at project close lists everything the contractor agreed to fix or finish before final payment. Read it as a maintenance document, not just a to-do list. Each line item tells you which system the contractor was watching, and by extension which systems to monitor going forward.
The written warranty should specify exactly three things:
- What’s covered and for how long. Labor warranty and material warranty are separate clocks. Tile manufacturer warranties often run through the manufacturer, not the installer, and require specific maintenance to stay valid.
- What voids coverage. Most waterproofing warranties are void if a homeowner caulks over a failing joint, applies an acid cleaner to cementitious grout, or fails to maintain the exhaust fan. These exclusions are normal, but you need to know them.
- What’s the homeowner’s ongoing responsibility. Grout sealing at specified intervals, fan cleaning, and glass door treatment are almost always homeowner tasks. Membrane integrity, tile bond, and plumbing rough-in are almost always contractor responsibility within the warranty period.
Under Clause 1 of the Haven Standard at Rowan Construction Group, every project is delivered with the written scope, the written warranty, and a documented photo record on every visit – which together form the maintenance baseline. If you’re holding a competitor’s estimate or warranty and want a free second opinion on whether the coverage actually protects you, we’ll read it line by line with you at no charge.
What a Failed Waterproof Membrane Looks Like
By the time water reaches your subfloor through a failed membrane, you’ve already been missing the signs for months. The trick is knowing what to look for from the tile face, where the evidence shows up first.
The early indicators, from most to least obvious:
- Hollow sound when you tap tile. Tap each floor tile with a plastic-handled tool and listen for a dull thud versus a sharp click. A dull sound means the tile has separated from the thinset, and once that happens the grout lines are your only barrier.
- A persistent dark grout line that stays dark. Grout that goes pale in 30 minutes after a shower is sealed. Grout that stays dark for 24+ hours is either unsealing or holding water behind the face.
- Efflorescence at the base of the shower. That white crystalline powder that appears at grout joints is water migrating through the tile assembly and evaporating at the surface, leaving mineral salts behind. Palmdale’s hard water makes this more visible here than in softer-water cities.
- A slight give when you press on the shower floor near the drain. This is the last indicator before visible damage, and it means the setting bed is compromised.
- Musty smell that returns even after cleaning. Odor is usually the first true sign that moisture has reached material that can support mold growth.
When any of these show up, the answer is not to caulk over the joint. Caulking over a failing membrane traps water inside the assembly and accelerates the damage to the studs and subfloor. When in doubt, call. The diagnostic cost is trivial compared to a rip-out and re-tile. If you’re also seeing maintenance issues on the exterior of your property, the same early-warning logic applies to your hardscape – the Driveway & Pavers in Palmdale guide covers what to check on Belgard paver joints before they fail.
The Full Schedule at a Glance
Here is the entire maintenance calendar in one place, with the product category each task applies to. Print it, tape it inside the vanity cabinet, and check it at the intervals.
- Monthly: Squeegee glass shower doors after every use, apply glass treatment monthly. Clean exhaust fan grille exterior. Wipe mineral film from fixtures and aerators.
- Quarterly: Reapply glass sealant. Check toilet fill valve for running. Test GFCI outlets.
- 6-month: Vacuum exhaust fan motor and blades. Deep clean grout with pH-neutral cleaner. Re-seal wet-area grout with penetrating sealer. Inspect all silicone caulk joints (100% silicone on shower floor, siliconized acrylic is never the right choice at the tub-to-tile joint). Replace any caulk that has failed.
- 12-month: Pull valve trim and inspect behind. Tap every shower floor tile for hollow spots. Reapply penetrating sealer to grout walls and floor. Check fan CFM with handheld anemometer. Replace exhausted caulk. Inspect shower door sweeps and replace if worn.
- 18-month: Re-seal grout across all wet areas in Palmdale (compressed from the standard 2-year interval due to local humidity).
- 2-year: Replace shower door sweeps and magnets. Replace toilet flapper. Deep-clean the shower pan drain trap.
- 5-year: Cut out and replace all silicone in the wet zone. Fresh coat of penetrating sealer everywhere. Replace toilet fill valve and flapper. Evaluate fan for full replacement. Replace shower valve cartridge O-rings.
- 10-year: Full inspection of waterproofing and tile bond by a contractor. Evaluate grout and caulk for full refresh. Budget for fixture replacement if hard water wear is visible.
Common Mistakes to Avoid
- Caulking over a failing joint instead of removing it. Laying new silicone on top of failed silicone traps moisture and hides the joint that needed diagnosis. Always cut out and replace.
- Using vinegar or acid cleaners on cementitious grout. In Palmdale’s hard-water environment, the temptation to use vinegar is strong – don’t. Acid etches grout surfaces and accelerates the fail you’re trying to prevent.
- Skipping the exhaust fan during the 6-month check. A fan below 70 CFM is what drives most of the moisture damage we see, and it’s invisible without testing.
- Assuming the tile manufacturer’s warranty covers maintenance failures. Most warranties exclude damage from a failed exhaust fan, failed caulk joint, or improper cleaning. Read the exclusions page before you need it.
- Doing the year-one inspection on your own without documentation. A verbal assessment of a hollow tile is not the same as a dated photo record. Document it whether you find a problem or not.
- Using siliconized acrylic caulk at the shower floor. It’s cheaper and easier and fails much faster in a wet, thermal-cycling environment. The right product is 100% silicone.
- Ignoring mineral film on glass. The white haze that appears on shower doors in hard water is deposited calcium. Once it bonds, it requires razor-blade removal or professional polish. Squeegee daily to prevent it.
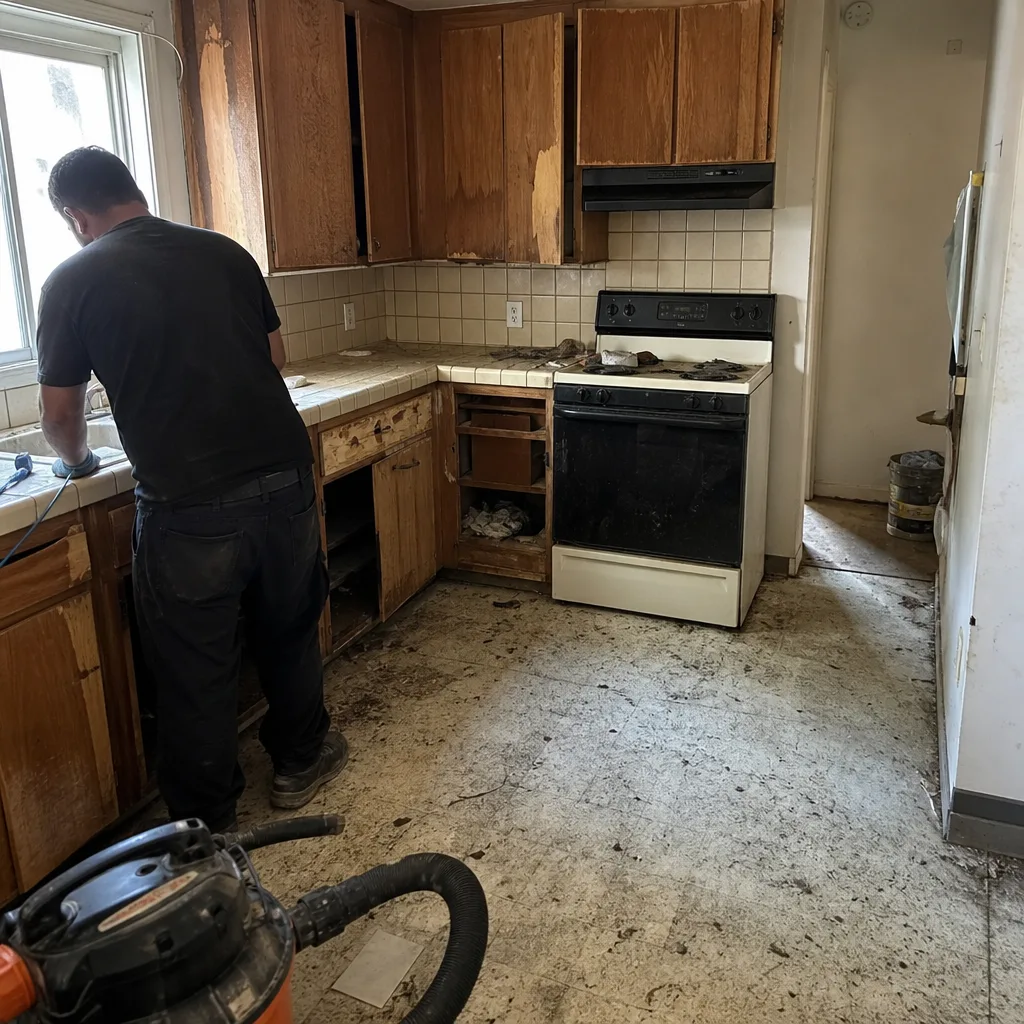
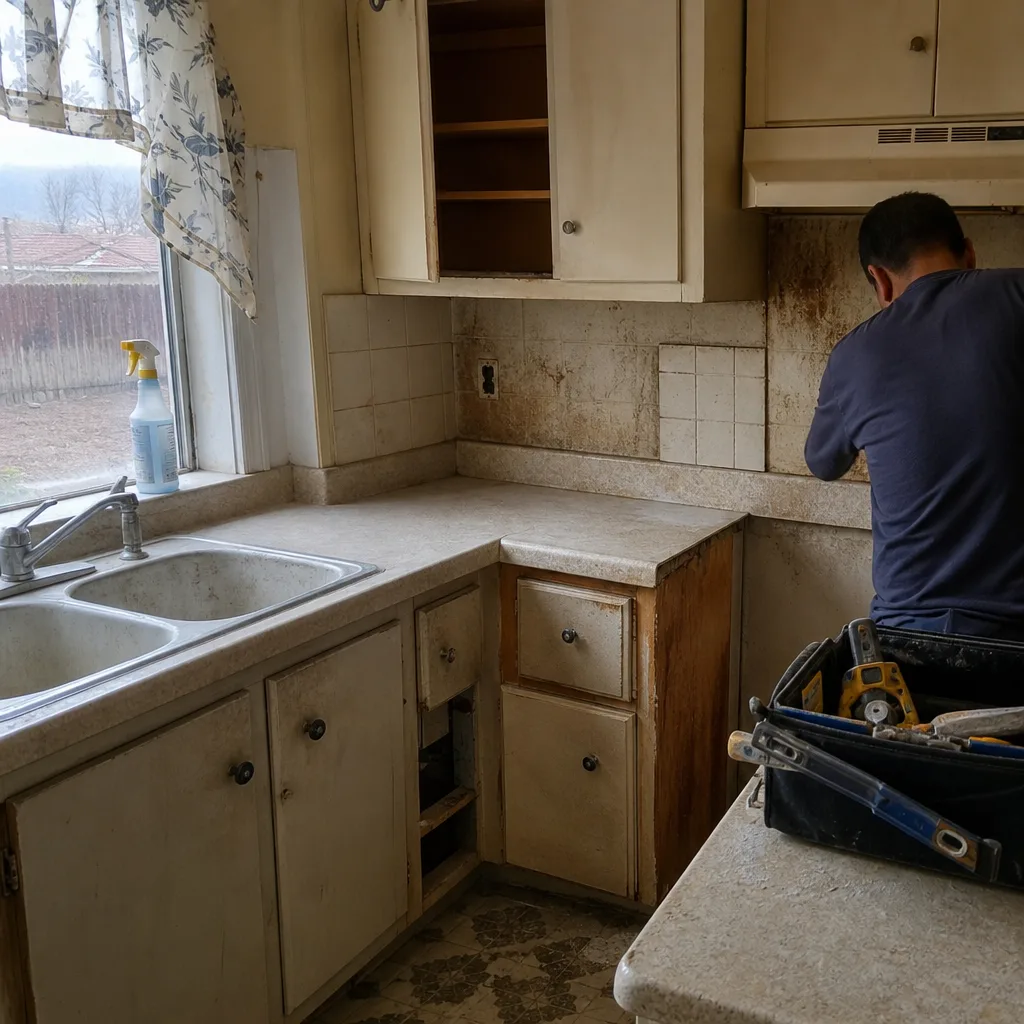
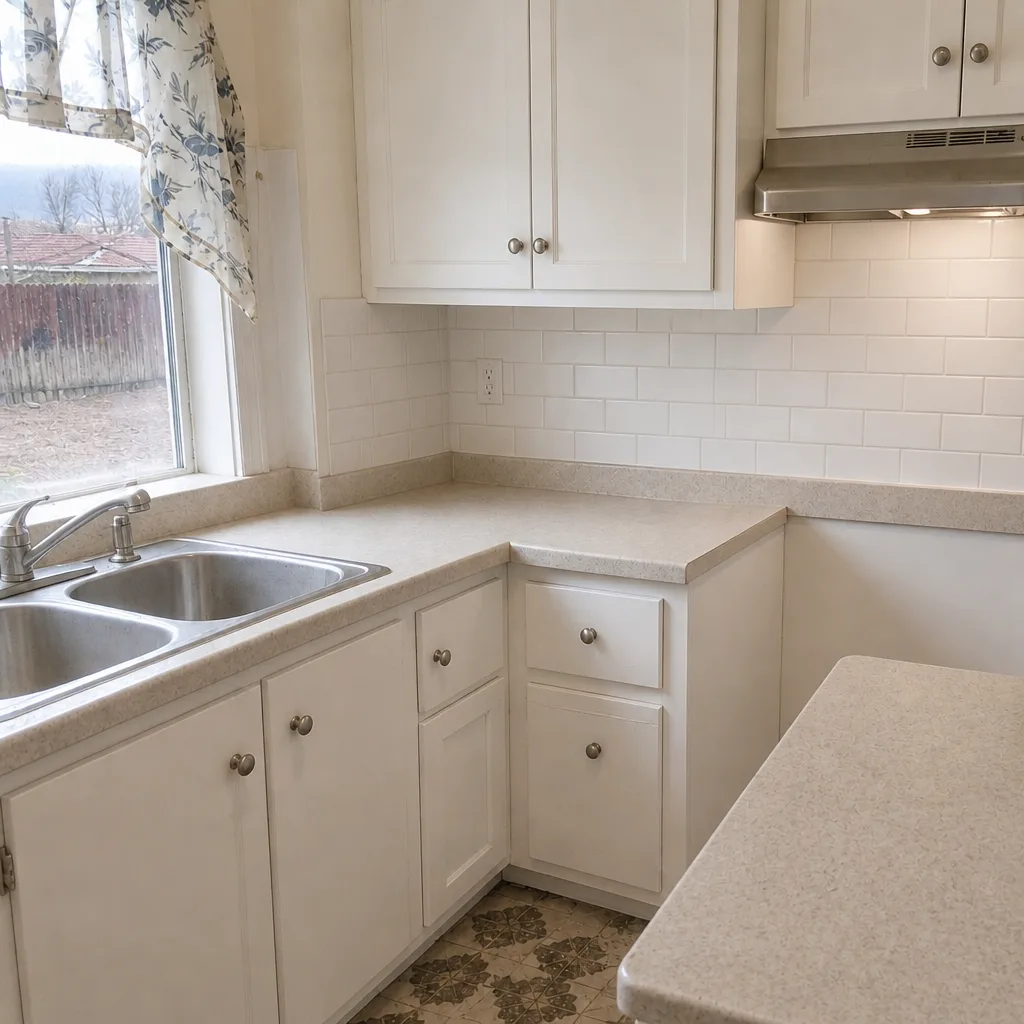
See the difference
 Before
 After
 Before
 After
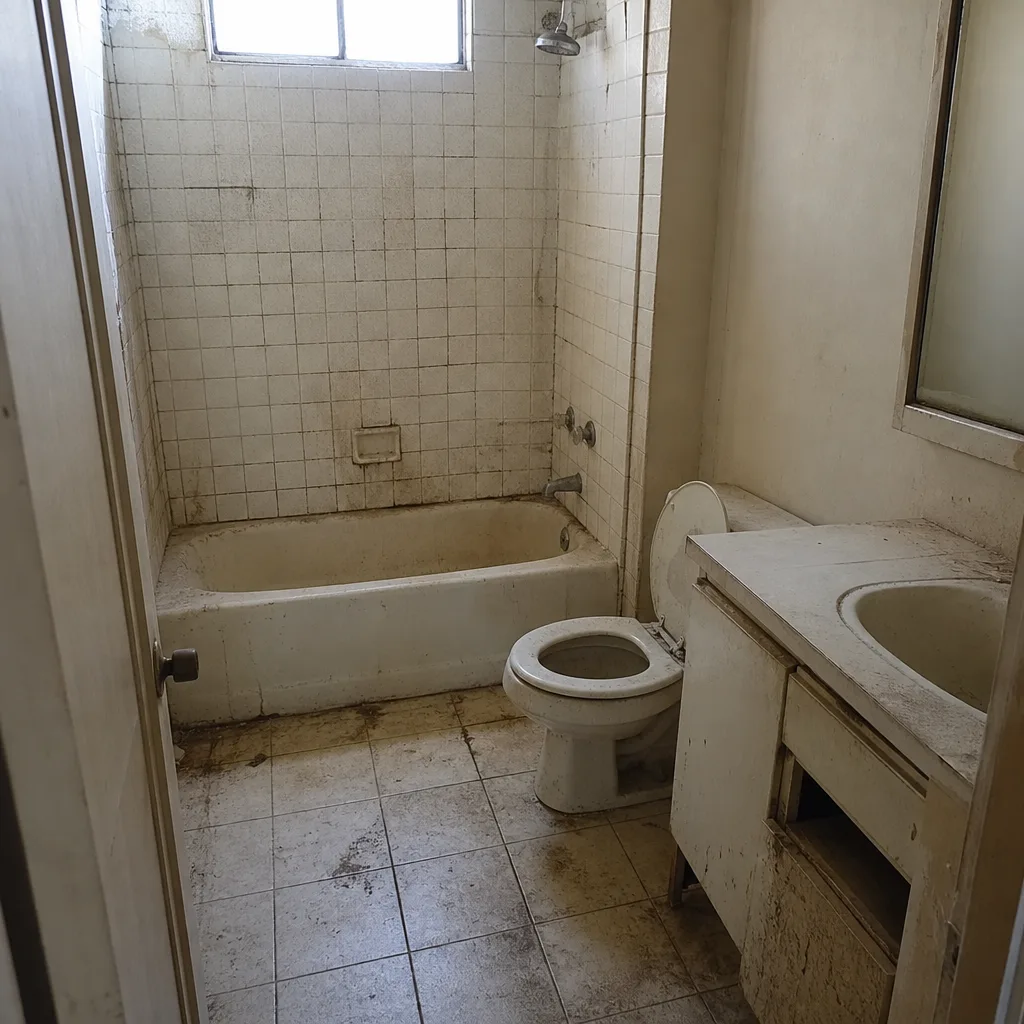 Before
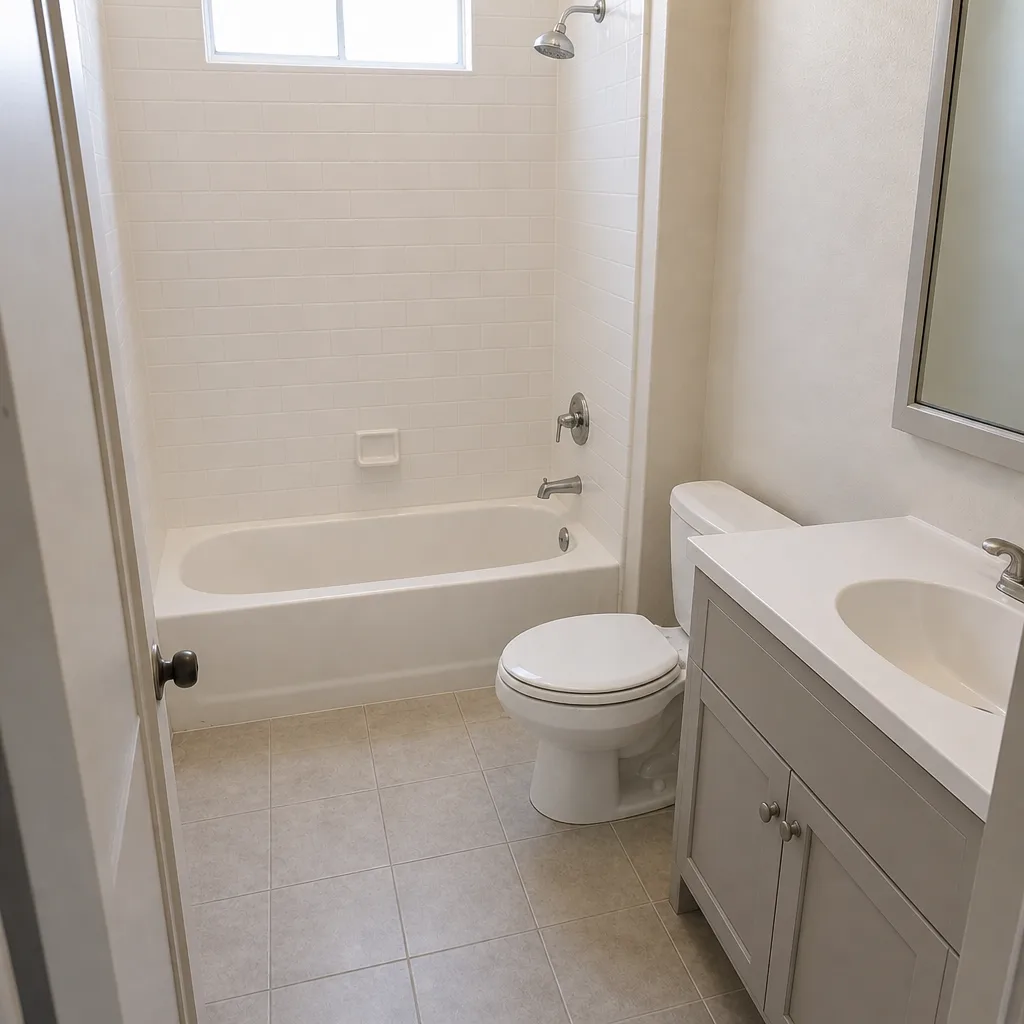 After
When to Call a Professional
Call before you caulk when you see any of the following: a persistent dark grout line in the shower that doesn’t dry overnight, hollow tiles when tapped, efflorescence at the shower base, any soft spot in the floor near the drain, or an exhaust fan that fails the toilet paper test after cleaning. Also call if your 1-year inspection turns up anything behind the valve trim, or if you don’t have a written warranty on the original installation – the maintenance plan only works if you know what’s covered. Waterproofing and membrane repairs are not homeowner territory, and caulking over a compromised membrane is the fastest way to turn a small repair into a full rip-out. Rowan Construction Group Palmdale offers free estimates in Palmdale – call (844) 320-8244 and we’ll put the inspection scope and price in writing before anything starts.
Frequently Asked Questions
Every 12 to 18 months in Palmdale, rather than the 2 to 3 years that sealant labels suggest for more humid climates. The dry desert air cures sealer faster than the manufacturer’s test conditions assume, and hard MWD water accelerates mineral absorption in the grout. If you just had a bathroom remodel completed, the first re-seal is at the 18-month mark, not the 2-year mark.
If a piece of toilet paper doesn’t stick to the grille when the fan runs for 15 seconds, or if the fan feels weak compared to when it was installed, it has dropped below working CFM. Bath fans degrade roughly 15-20% per year without cleaning; if it started at 110 CFM and it’s been more than 4 years without cleaning, it may be below the 60% threshold where moisture damage risk begins. Replace, don’t repair, once a fan falls below that threshold.
No. Caulking over a failed joint traps moisture behind the caulk and accelerates the damage to the studs and subfloor. Cut out the old caulk fully, dry the joint, and apply 100% silicone to a clean surface. If the joint failed because the waterproofing behind it is compromised, caulking is the wrong tool entirely.
Dark grout lines that stay dark for 24 hours after a shower, white efflorescence powder at the shower base, and a slight give when you press the shower floor near the drain. Hollow-sounding tiles when tapped are the diagnostic sign that the bond has broken. In Palmdale, the hard water makes efflorescence more visible, which is helpful – you catch it earlier.
Almost never. Standard warranty documents cover defects in materials and labor – failed tile bond, membrane failure from installation error, plumbing leaks at rough-in. Grout sealing, exhaust fan cleaning, caulk replacement, and glass door treatment are documented homeowner responsibilities and maintaining them protects your warranty rather than voiding it. If you’ve lost the warranty document, call the contractor before doing anything yourself.
A clogged or undersized exhaust fan. It’s the one component most homeowners never look at, and it silently causes the moisture conditions that lead to grout failure, mold, and eventually subfloor damage. The second most common is siliconized acrylic caulk used at shower floor joints instead of 100% silicone. Both are avoidable with a 6-month check.
The Bottom Line
A bathroom remodel’s useful life is set by what happens in its first five years – not by how much you spent on tile. The schedule in this guide is short: a 30-day diagnostic walk, a 6-month fan and grout check, a 1-year waterproofing inspection, and a 5-year sealant refresh. In Palmdale, tighten the grout and caulk intervals because the desert air and hard water move faster than the standard guidance assumes. Read your warranty documents, keep the photo record from your contractor, and call for a professional inspection the moment the signs of membrane failure appear – before you caulk. If you’re also maintaining the outside of the property, our Fence Installation in Palmdale guide runs through the same early-warning approach for fence posts and hardware.
When you’re ready to have a professional walk the bathroom and put a written inspection scope and price on paper before anything starts, call Rowan Construction Group Palmdale at (844) 320-8244 for a free estimate. We’ll bring the checklist, we’ll document what we find, and you’ll have a written number to compare.
Written by the team at Rowan Construction Group Palmdale.